With Windows Vista, Microsoft replaced the
functionality of the Scanner and Camera Wizard with the Windows Gallery,
which has now been replaced in Windows 7 with the Windows Pictures
Library. The Windows Pictures Library allows you to scan images from a
scanner, copy images from a digital still camera, or import a movie from
a supported video camera. Almost any modern imaging device is supported
by Windows Pictures Library. If you have more than one imaging device
supported by Windows 7, you can import images from any of them from
within the Windows Pictures Library or in the new Windows Media Player.
Using Windows Pictures Library with a Scanner
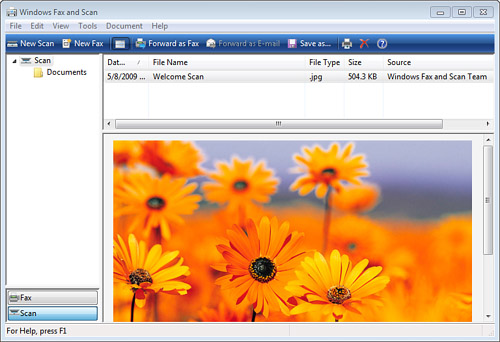
To start the
Windows Pictures Library with your scanner, push the Scan button on your
scanner. This will open the new Windows Fax and Scan application (see Figure 1).
You may also use the image acquisition feature from within your
favorite photo editor or paint program. Image acquisition is located in
the File menu of most applications.
When the wizard starts, follow this procedure to scan your pictures:
1. | On
the Choose Scanning Preferences screen, select the profile (which
defaults to photo) and select New Scan to prescan your picture with
default settings. With some scanners, you might need to press the Scan
button on the scanner itself to perform the preview (see Figure 10.2).
|
2. | You
can manually adjust the contrast, brightness, and resolution for the
scan (I recommend 75dpi for scans you plan to use in slideshows and
150–300dpi for scans you want to print). After this is done, click Scan
to acquire the picture from the scanner.
Tip If
you place only one photo on your scanner, the wizard automatically
selects it for you. Adjust the scan boundaries by dragging the corners
only if you want to crop the photo during the scan. If you place more
than one picture on the scanner, you will need to adjust the scan
boundaries manually to scan each photo. |
|
3. | When
scanning is complete, you will be prompted to tag the picture. This is
optional but will make finding your scanned pictures easier after they
are imported into Windows Pictures Library. Click OK, and the picture is
shown as it is imported into the Photo Library.
|
If
your scanner was working fine with Windows XP, but you find that
Windows 7 will not show it in Windows Pictures Library, there are some
things you can try. The
Windows Pictures Library is certainly a convenient way to use your
scanner, but it’s not the only way. Before you try the scanner again, be
sure you install drivers for your scanner that are compatible with
Windows 7 or Vista. You might be able to use Windows XP–compatible
drivers if you can’t get Windows 7 drivers yet. Install the latest
drivers available (you might need to restart your computer afterward)
and try the wizard again. Windows Update is a great way to get new
drivers. Next, see whether
you can use the scanner with its own TWAIN or ISIS driver. If you can,
you don’t need to use Windows Pictures Library. Remember to use the Scan
button on the scanner if it has one; some scanners require you to push
this button to start the scanning process. Contact
the scanner vendor for help if you’re still unable to use the scanner
with either the wizard or its own scanning software. Finally,
you need a way to view and organize your pictures after you’ve scanned
them. Although the Pictures folder has some built-in tricks, third-party
software can help you view and locate pictures stored in any folder and
on any type of media. Here are a few programs that you should consider: IrfanView (www.irfanview.com)—
IrfanView is one of the oldest and most venerated freeware image
viewers and processors available. It works just fine with Windows 7 and
even has a nice thumbnail manager for organizing your images outside the
Windows libraries system. Go to Options, Properties/Settings, open the
Toolbar tab, and select the Grosberg_24 set. It’s a lot easier to see in
Windows 7. Google’s Picasa (www.picasa.com)—
If you’re a Google user, then Picasa 3 may just be the answer for you.
Not only does it handle images like the old Vista Photo Gallery (just
way better), it also lets you manage your albums online and gives you
more options to share your pictures.
|
|
Using Windows Pictures Library with a Digital Camera
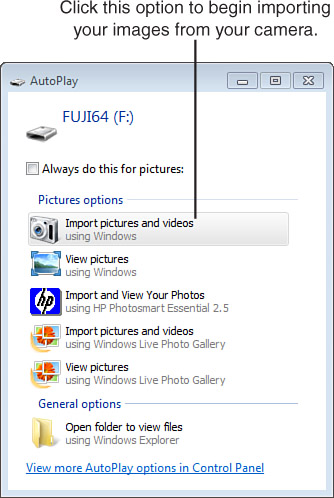
Importing
photographs from your digital camera is a simple process. The import
process is automatically started when your camera is connected and
powered on. You will see a dialog box similar to Figure 2
(your camera name will appear at the top of the dialog box). You can
begin the import process by selecting the highlighted option, Import
Pictures and Videos Using Windows.
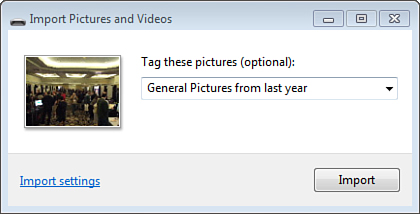
Windows will scan your camera’s storage media for any and all pictures and videos and will ask you to add tags (see Figure 3). Do so and click Import.
Tip
The
first time you connect your digital camera to your computer, Windows 7
might need to load drivers specifically for your camera. For most modern
cameras, this is a transparent process that only takes a few seconds,
but it might be a good idea to have any CDs or DVDs that came with the
camera on hand, in case specialized drivers are required. Sony cameras
in particular, which use the proprietary Sony Memory Stick technology,
have required special drivers be installed. Windows 7 has a lot more
drivers preinstalled than previous versions of Windows. |
Once Windows has completed the import it will open the Imported Pictures and Videos page for you to review.
Windows offers a
default collection of settings that control how pictures and videos are
imported into your computer. You can change how these settings work
before you even complete your first import by clicking the Import
Settings link in the Import Pictures and Videos dialog box to open the
Import Settings dialog box, shown in Figure 4. The following are the options:
Settings For—
Use this menu to select which settings you will be modifying. In this
case, the Cameras and Portable Devices option should already be
selected.
Import Images To—
Enables you to choose the top-level folder where the pictures are
imported. A subfolder will be created for each import session, depending
on the setting of the Folder Name option.
Import Videos To— You may also select a different folder to import videos to, and Windows 7 knows how to tell the files apart.
Folder Name—
This option allows you to specify the folder to which the pictures will
be imported. As stated, this is a subfolder of the Import Images To
option.
File Name— Identify
the naming convention used to name the individual pictures. Preserve
Folders means use the existing folder arrangement on the card or camera.
You would use this option if you have a fancy camera and you organize
your photos in your camera, or you had already organized the photos on a
CD or DVD or removable camera card or USB flash drive using another
program. More likely, you’ll want to use the Tag setting.
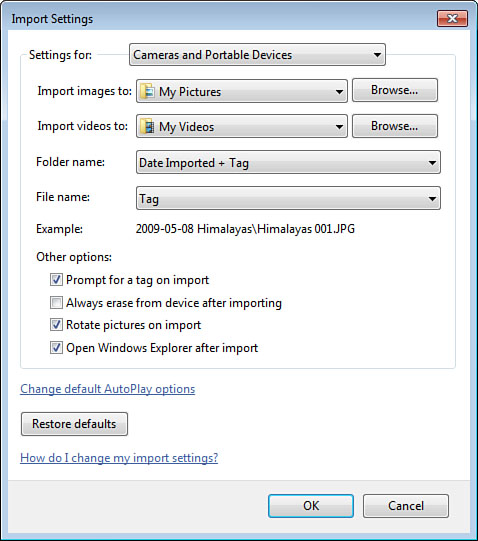
The next set of options
controls how Windows deals with the import process. First, you will
want to leave checked the Prompt for a Tag on Import option, because
that will help you keep your import sessions organized. The Always Erase
from Device After Importing option does allow you to clear your camera
after each use, but Windows 7 now knows what images it has already
imported, so it will not re-import duplicates over and over again.
Choosing this option is generally a good idea unless you have another
way to erase the pictures from your camera.
If your camera
knows what orientation it was held in when the images were taken, you
are also given the option to perform automatic rotation of your images
on import. Finally, you can choose whether you prefer Windows Explorer
to open following the import.
After you set the
options to your liking, click the OK button and click Import in the
Import Pictures and Videos dialog box. The wizard displays each picture
while it copies the selected pictures and provides a status display
onscreen, shown in Figure 5.
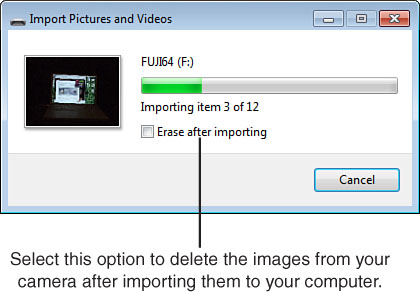
If you chose to delete
the pictures from your imaging device, the wizard will delete them from
your camera after it has successfully imported them to your computer and
inform you of its progress.
Now the pictures are
imported from your digital camera into the Windows Pictures Library. You
can view each of the pictures and, if needed, perform some basic
manipulation on them in Windows Media Player, as outlined in the next
section.